Comprehensive Woodwork Plans for DIY Enthusiasts

Unlock Your Inner Craftsman: A Deep Dive into DIY Woodworking

Hey there, fellow woodworking enthusiasts! So you're itching to build something amazing with your own two hands? Fantastic! Woodworking is incredibly rewarding, and whether you're a complete beginner or have a few projects under your belt, there's always something new to learn. This guide is designed to be your comprehensive resource, walking you through everything from planning your project to the final sanding. Let's get started!

Choosing Your First Project: Starting Small is Smart

The biggest mistake beginners make is jumping into something overly ambitious. You don't want to be staring at a half-finished, frustrating project for months. Instead, start with something manageable, something that will give you a sense of accomplishment without overwhelming you. Think simple, functional pieces:

Perfect Beginner Projects:

  • A simple shelf: This teaches you about measuring, cutting, and assembling. Plus, you'll actually *use* it afterward!
  • A small birdhouse: A charming project that lets you practice precise cuts and learn about joinery (though you can get away with basic nails or screws at first).
  • A cutting board: A great way to learn about finishing and working with different types of wood.
  • A picture frame: Helps you practice accurate miter cuts and assembly.

Once you've completed a few small projects, you'll build confidence and gain the skills needed to tackle more complex designs. Remember, the journey is just as important as the destination!

Gathering Your Tools: The Essentials and Beyond

You don't need a full woodworking shop to get started. But having the right tools makes the process much easier, safer, and more enjoyable. Here's a basic list:

Essential Tools for Beginners:

  • Measuring Tape: Accuracy is key! Get one that's at least 25 feet long.
  • Pencil: For marking your cuts and designs.
  • Hand Saw: A good starting point for learning basic cuts. A fine-tooth saw is best for cleaner cuts.
  • Safety Glasses: Always protect your eyes! This is non-negotiable.
  • Claw Hammer: For driving nails (if you're not using screws).
  • Screwdriver Set: Both Phillips and flathead are essential.
  • Sandpaper: Various grits (from coarse to fine) for smoothing surfaces.
  • Wood Glue: A crucial element for strong joints.
  • Clamps: Essential for holding pieces together while the glue dries.

Gradually Expanding Your Tool Collection:

As you progress, you might want to consider adding these tools to your arsenal:

  • Circular Saw: For faster, more accurate cuts than a hand saw.
  • Drill Press: For creating precise holes.
  • Router: For shaping edges and creating intricate details.
  • Planer: For smoothing rough lumber and creating uniform thickness.
  • Jigsaw: For making curved cuts.

Remember to research each tool thoroughly before purchasing, focusing on quality and safety features.

Choosing Your Wood: Understanding Different Types

Wood comes in a huge variety, each with its own unique properties. For beginners, I recommend starting with softer woods that are easier to work with:

Beginner-Friendly Wood Types:

  • Pine: Affordable, readily available, and relatively easy to cut and shape.
  • Basswood: Very soft and smooth, ideal for carving and intricate projects.
  • Poplar: A bit stronger than pine, takes paint and stain well.

As you gain experience, you can experiment with harder woods like oak, maple, or cherry, but be prepared for a tougher challenge! Consider the final look you want to achieve; some woods have richer colors and grains than others.

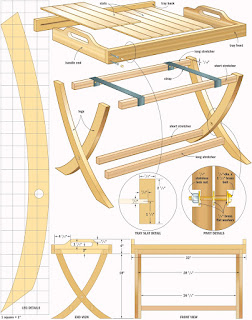
Planning Your Project: The Blueprint to Success

Before you even pick up a saw, you need a plan. This doesn't need to be a professional-level blueprint, but a sketch or diagram showing the dimensions, cuts, and joinery techniques will save you a lot of headaches down the line. Consider these steps:

Essential Planning Steps:

  • Sketch your design: A simple drawing is sufficient to start.
  • Measure twice, cut once: This is the golden rule of woodworking. Accurate measurements are crucial.
  • Choose your wood: Select the appropriate type and quantity of wood.
  • Select your joinery: Decide how you will connect the different pieces (nails, screws, dowels, etc.).
  • Gather your tools and materials: Make sure you have everything you need before you start.

Good planning will lead to a smoother, more enjoyable woodworking experience.

Finishing Touches: Protecting and Enhancing Your Creation

The finishing process is just as important as the construction. It protects your project from damage and enhances its appearance. Here are some popular options:

Finishing Options:

  • Sanding: Start with coarser grit sandpaper and gradually move to finer grits for a smooth finish.
  • Staining: Adds color and enhances the wood grain.
  • Painting: Offers a wide range of colors and finishes.
  • Sealing: Protects the wood from moisture and wear; varnish, polyurethane, or shellac are common choices.

Remember to follow the manufacturer's instructions for each product, allowing adequate drying time between coats. A well-finished project will look professional and last for years to come.

Commonly Asked Questions

Q: What's the best wood for beginners?

A: Pine, basswood, and poplar are all excellent choices for beginners due to their softness and ease of working.

Q: Do I need a lot of expensive tools to start?

A: No! You can start with a basic set of hand tools and gradually expand your collection as your skills and projects grow.

Q: How do I avoid mistakes?

A: Careful planning, accurate measuring, and taking your time are key to avoiding mistakes. Don't rush the process!

Q: Where can I find woodworking plans?

A: There are tons of free plans online (Pinterest, various woodworking blogs and websites) and you can also purchase plans from woodworking supply stores.

Q: What safety precautions should I take?

A: Always wear safety glasses, use appropriate dust masks, and keep your work area clean and organized. Be aware of the dangers of sharp tools and always follow the instructions for each tool and finishing product.

Happy woodworking, and remember to have fun! The process is just as rewarding as the finished product. Don't be afraid to experiment, learn from your mistakes, and enjoy the journey of creating something beautiful with your own hands.

Share:

Armoire Furniture Plans for Stylish and Efficient Storage Solutions

Armoire Furniture Plans for Stylish and Efficient Storage Solutions

Armoires, those elegant and versatile pieces of furniture, offer a sophisticated solution to storage challenges in any home. Their inherent design, typically characterized by a tall, enclosed structure with doors and often internal shelving, allows for efficient organization and a visually appealing way to conceal clutter. This comprehensive guide delves into the design considerations, construction techniques, and stylistic choices involved in creating custom armoire furniture plans, enabling both novice and experienced woodworkers to build their own bespoke storage solutions.

I. Design Considerations: Planning Your Armoire

Before embarking on the construction process, meticulous planning is paramount. The success of your armoire hinges on carefully considering several key design aspects:

A. Dimensions and Proportions

The dimensions of your armoire should be dictated by the available space and the intended purpose. Accurate measurements are crucial to avoid construction errors. Consider the height of your ceilings, the width of the space where the armoire will be placed, and the overall depth required for your storage needs. Maintaining harmonious proportions between height, width, and depth is essential for a visually pleasing result. A well-proportioned armoire will integrate seamlessly into its surroundings.

B. Storage Requirements and Internal Configuration

The internal layout of your armoire is critical to its functionality. Consider the types of items you intend to store. Will it be primarily for clothing, linens, or a combination of items? Based on this, you can design the internal configuration accordingly. Options include:

  • Shelving: Adjustable shelves offer maximum flexibility, allowing you to customize the space to accommodate various items.
  • Hanging Rods: Include hanging rods for clothes, ensuring sufficient clearance for longer garments.
  • Drawers: Integrate drawers for smaller items, such as folded clothes, accessories, or linens.
  • Compartments: Create dedicated compartments for shoes, bags, or other specific items.
  • Mirror: Incorporate a full-length mirror on the interior of one of the doors for added convenience.

C. Style and Aesthetics

The style of your armoire should complement the overall aesthetic of your home. Consider the following stylistic elements:

  • Wood Type: Choose a wood type that reflects your desired aesthetic. Oak, cherry, maple, and walnut are popular choices, each offering a distinct grain pattern and color.
  • Door Style: Select door styles that align with your chosen aesthetic. Options include panel doors, raised panel doors, flat doors, and glass-paneled doors.
  • Hardware: Hardware choices, such as knobs, pulls, and hinges, play a significant role in the overall look. Consider the style, finish, and material of the hardware to enhance the visual appeal.
  • Finishing: The final finish significantly impacts the appearance of your armoire. Options include staining, painting, or a combination of both.

II. Construction Techniques: Building Your Armoire

The construction process involves several key steps, requiring precision and attention to detail. A well-constructed armoire will stand the test of time and provide years of reliable storage.

A. Cutting and Preparing the Lumber

Begin by accurately cutting the lumber according to your plans. Ensure all cuts are precise and square. Properly preparing the lumber, including planing, sanding, and jointing, is essential for a smooth and professional finish. Using appropriate joinery techniques, such as mortise and tenon joints or dovetail joints, will strengthen the structure of the armoire.

B. Assembling the Carcase

Assemble the main carcase of the armoire, ensuring all joints are tight and secure. Use clamps to hold the pieces together during assembly. Once the carcase is assembled, check for squareness and make any necessary adjustments. A well-built carcase provides the foundation for a strong and durable armoire.

C. Installing Internal Features

Install the internal features, such as shelves, hanging rods, and drawers, according to your plan. Ensure that all shelves are securely fastened and that the hanging rods are properly supported. Accurate placement of internal components is crucial for optimal functionality.

D. Attaching Doors and Hardware

Attach the doors to the carcase, ensuring proper alignment and functionality. Install the chosen hardware, such as knobs, pulls, and hinges. Precise installation of the hardware will enhance both the aesthetic appeal and the usability of your armoire.

E. Finishing Touches

Apply the chosen finish, whether stain, paint, or a combination of both. Multiple coats of finish will protect the wood and enhance its appearance. Sanding between coats is essential for a smooth and even finish. Finally, add any decorative elements, such as molding or trim, to complete the project.

III. Stylish Variations and Customization

The beauty of building your own armoire lies in the ability to customize it to your exact needs and preferences. Explore these stylistic variations to personalize your design:

A. Shaker Style Armoire

The Shaker style emphasizes simple lines, clean functionality, and minimal ornamentation. A Shaker armoire typically features flat-panel doors with simple hardware and a straightforward construction.

B. Mission Style Armoire

Mission style armoires showcase robust construction and heavy, dark wood. The design incorporates strong lines and simple, functional details. These armoires often feature decorative metal hardware.

C. French Provincial Armoire

French Provincial armoires exhibit a more ornate and detailed design. They often feature curved lines, decorative carvings, and intricate hardware. The use of lighter woods, such as pine or cherry, is common.

D. Modern Minimalist Armoire

A modern minimalist armoire prioritizes clean lines, simple forms, and a lack of ornamentation. The focus is on functionality and understated elegance. The use of sleek hardware and a minimalist color palette completes this style.

IV. Conclusion: Embarking on Your Armoire Project

Constructing your own armoire is a rewarding project that allows for personalized design and functionality. By carefully planning your design, employing sound construction techniques, and considering stylistic choices, you can create a beautiful and functional piece of furniture that enhances your home's aesthetic and storage capacity. Remember that accurate measurements, meticulous attention to detail, and a commitment to quality craftsmanship are key to achieving a successful outcome. The satisfaction of creating a custom piece that perfectly meets your needs is unmatched, turning a storage solution into a statement piece that reflects your personal style and enhances your living space.

Share:

Access Free Online Woodworking Projects for Instant Inspiration

Unlocking a World of Wooden Wonders: A Comprehensive Guide to Free Online Woodworking Projects

The allure of woodworking lies in its ability to transform raw materials into functional and aesthetically pleasing creations. Whether you're a seasoned craftsman or a novice picking up a chisel for the first time, the vast expanse of free online resources offers unparalleled opportunities for inspiration and skill development. This comprehensive guide explores the wealth of readily available projects, offering a structured approach to finding the perfect fit for your skill level and aspirations.

Navigating the Digital Landscape of Woodworking Projects

The internet has revolutionized access to woodworking knowledge. No longer are aspiring woodworkers confined to limited library resources or expensive instructional manuals. Countless websites, blogs, and video platforms now provide detailed plans, tutorials, and inspiration for projects of all complexities. This readily accessible information democratizes woodworking, allowing individuals of all backgrounds to engage in this rewarding craft.

Identifying Reputable Sources

While the abundance of online resources is advantageous, it's crucial to exercise discernment. Not all sources are created equal. Prioritize websites and platforms with established reputations for accuracy, detailed instructions, and a commitment to safety. Look for sites with user reviews and comments, indicating a community of active users who can vouch for the quality of the information provided.

Key indicators of a reputable source include:

  • Clear and concise instructions, including detailed diagrams and measurements.
  • High-quality images and videos showcasing the project's construction process.
  • A comprehensive materials list, specifying types and quantities.
  • Safety precautions explicitly mentioned throughout the instructions.
  • A responsive and helpful community forum or comment section.

Utilizing Diverse Platforms

The online woodworking community extends across numerous platforms. Websites dedicated specifically to woodworking often feature project plans categorized by skill level, style, and type of wood. Video-sharing platforms like YouTube offer a visual learning experience, demonstrating techniques and processes in real-time. Blogs authored by experienced woodworkers often provide insightful commentary, tips, and personal project accounts.

Exploring these various platforms can significantly broaden your exposure to different styles, techniques, and project ideas. Cross-referencing information across multiple sources can enhance your understanding and help you identify potential challenges before embarking on a project.

Categorizing Projects by Skill Level

Finding a project that aligns with your skill level is crucial for a positive woodworking experience. Starting with overly ambitious projects can lead to frustration and discouragement. Conversely, selecting projects that are too simplistic may stifle your growth and limit your learning potential. Many online resources categorize projects based on skill level, typically ranging from beginner to advanced.

Beginner-Friendly Projects: Building Confidence

Beginner projects often focus on fundamental woodworking techniques, such as cutting, sanding, and joining. These projects typically involve straightforward designs and fewer components, minimizing complexity and maximizing the learning experience. Examples include simple shelves, coat racks, and small boxes. The emphasis is on mastering basic tools and techniques, building confidence, and developing a foundation for more complex projects.

Intermediate Projects: Refining Skills and Techniques

Once basic techniques are mastered, intermediate projects introduce more intricate designs and joinery methods. These projects may involve curved surfaces, more precise measurements, and the use of a wider range of tools and techniques. Examples include chairs, tables with simple joinery, and more complex boxes with intricate designs. This stage focuses on refining existing skills and expanding the repertoire of techniques.

Advanced Projects: Mastery and Creativity

Advanced projects demand a high level of skill, precision, and creativity. These projects often incorporate challenging joinery techniques, intricate designs, and the use of specialized tools. Examples include intricate furniture pieces, musical instruments, and highly detailed carvings. This stage allows for the expression of individual creativity and mastery of advanced woodworking techniques. Many advanced projects require a significant time investment and meticulous attention to detail.

Exploring Project Types and Styles

Beyond skill level, projects are often categorized by their intended function and aesthetic style. Understanding these categories can help you narrow your search and find projects that align with your interests and needs.

Functional Projects: Serving a Purpose

Functional projects serve a practical purpose in the home or workshop. This could range from simple shelving units and tool organizers to more complex items such as custom-built furniture or specialized workshop equipment. These projects provide a sense of accomplishment knowing the item serves a real-world need.

Decorative Projects: Enhancing Aesthetics

Decorative projects focus primarily on aesthetics, enhancing the visual appeal of a space. These might include intricate wall hangings, decorative boxes, or sculpted wooden figures. The emphasis here is on craftsmanship and artistic expression, turning functional pieces into art objects.

Specific Styles: Reflecting Personal Taste

Woodworking encompasses a multitude of styles, reflecting various cultural influences and design aesthetics. From rustic farmhouse styles to sleek modern designs, understanding the nuances of different styles can guide your project selection. Researching various styles can provide inspiration and help you choose a project that reflects your personal taste and preferences.

Conclusion: Embracing the Journey of Woodworking

The wealth of free online woodworking projects offers an unparalleled opportunity to learn, create, and express oneself through the art of woodworking. By carefully selecting projects that align with your skill level, interests, and available resources, you can embark on a rewarding journey of craftsmanship. Remember to prioritize safety, research reputable sources, and enjoy the process of transforming raw materials into beautiful and functional creations. The online woodworking community offers a supportive and inspiring environment, ensuring that your woodworking journey is filled with learning, creativity, and lasting satisfaction.

Share:

Shelf Woodworking Plans for Organizing and Displaying

Comprehensive Guide to Crafting Functional and Aesthetically Pleasing Shelves

Shelving units serve a dual purpose: efficient organization and visually appealing display. This comprehensive guide delves into the design, construction, and finishing of various shelf styles, empowering both novice and experienced woodworkers to create bespoke shelving solutions for any space. From simple floating shelves to intricate, multi-tiered structures, the possibilities are vast, limited only by your creativity and woodworking skills.

Planning Your Shelf Project: Design Considerations

Before commencing any woodworking project, meticulous planning is paramount. This stage involves determining the intended purpose, location, and desired aesthetic of your shelves. Careful consideration of these factors will influence the choice of wood, design, dimensions, and finishing techniques.

Defining the Purpose and Location

The intended function of your shelves significantly impacts their design. Are they for displaying cherished collectibles, storing books, showcasing plants, or a combination thereof? The answer dictates the shelf depth, spacing, and overall dimensions. The location also plays a crucial role. Shelves in a high-humidity bathroom require water-resistant wood and finishes, while shelves in a living room may prioritize aesthetic appeal. Consider the weight capacity required; robust shelving for heavy books demands stronger materials and supports than shelving for lightweight decorative items.

Selecting the Appropriate Wood

The selection of wood is crucial for both functionality and aesthetics. Hardwoods such as oak, maple, and cherry offer durability and a rich aesthetic, but come at a higher cost. Softwoods like pine and fir are more affordable and readily available but may require additional reinforcement for heavy loads. The choice also hinges on your desired finish. Woods with a tighter grain, like maple, tend to accept stain more evenly than woods with more open grain, such as oak. Consider the following factors:

  • Strength and Durability: Hardwoods generally offer superior strength.
  • Cost: Hardwoods are typically more expensive than softwoods.
  • Aesthetic Appeal: The grain pattern, color, and texture of the wood will influence the final appearance.
  • Workability: Some woods are easier to work with than others.
  • Sustainability: Consider sourcing wood from responsible and sustainable forestry practices.

Determining Dimensions and Style

Once the purpose and wood type are chosen, precise dimensions are vital. Carefully measure the available space and determine the number of shelves, their depth, width, and spacing. Consider the overall style – floating shelves offer a minimalist aesthetic, while traditional bookcases provide ample storage. Sketches and detailed diagrams are invaluable tools to visualize the final product and ensure accurate cuts.

Constructing Your Shelves: A Step-by-Step Guide

This section provides a general guide for constructing various shelf types. Specific techniques may vary based on design and chosen materials. Always prioritize safety by using appropriate safety equipment, such as safety glasses and dust masks.

Building Basic Floating Shelves

Floating shelves create a clean, contemporary look. These typically involve concealed brackets or supports. The construction involves cutting the shelf to the desired dimensions, carefully prepping the mounting surface, and securing the brackets. Accurate measurements are crucial to ensure a flush, level installation. Consider using wood glue and screws for robust attachment.

Constructing Traditional Bookcases

Traditional bookcases provide more extensive storage and often incorporate multiple shelves supported by vertical posts and horizontal supports. These require more intricate joinery techniques, such as mortise and tenon joints or dowel joints, for superior strength and stability. Precise cutting and assembly are crucial to ensure a square and sturdy structure.

Creating Corner Shelves

Corner shelves maximize space utilization in often-underutilized areas. These shelves often involve angled cuts and careful planning to ensure a seamless fit. Precise angle measurements and secure joinery are crucial for stability and visual appeal. Consider using specialized corner brackets or joinery techniques designed for angled connections.

Finishing Your Shelves: Enhancing Aesthetics and Durability

The finishing stage significantly impacts the longevity and appearance of your shelves. Proper finishing protects the wood from moisture damage, scratches, and discoloration, while enhancing its natural beauty.

Sanding Techniques for Smooth Surfaces

Thorough sanding is essential to create a smooth surface for even stain or paint application. Start with coarser grit sandpaper and progressively move to finer grits to achieve a smooth, even finish. Pay particular attention to edges and corners to eliminate any splintering. Sanding in the direction of the wood grain prevents scratches and ensures a professional finish.

Applying Stain or Paint for a Desired Finish

The choice between stain and paint depends on personal preference and the desired aesthetic. Stains enhance the natural wood grain, while paints offer a solid color and greater protection. Apply multiple thin coats, allowing each coat to dry thoroughly before applying the next. Proper application techniques, such as using a brush or rag, and ensuring even coverage are crucial for a professional-looking finish.

Applying Protective Coatings for Durability

Protective coatings, such as polyurethane or varnish, enhance the durability and longevity of the shelves. These coatings provide a barrier against moisture, scratches, and UV damage. Apply several thin coats, allowing each coat to dry completely before applying the next. Consider using a high-quality finish for optimal protection and a beautiful sheen.

Safety Precautions and Tools

Woodworking involves inherent risks. Always prioritize safety by wearing appropriate safety gear, including safety glasses, ear protection, and a dust mask. Use sharp tools properly and maintain a clean and organized workspace. Familiarize yourself with the operation of each tool before using it. Invest in high-quality tools for accurate cuts and a professional finish. A well-stocked toolbox includes, but is not limited to, a measuring tape, pencil, saw, drill, sandpaper, clamps, and safety equipment.

By following these comprehensive steps and exercising careful planning and execution, you can craft beautiful and functional shelves that enhance the organization and aesthetic appeal of any space. Remember, the key to success lies in careful planning, precise execution, and attention to detail.

Share:

Hutch Woodworking Plans for Practical Storage Solutions

Hutch Woodworking Plans for Practical Storage Solutions

The humble hutch, a versatile piece of furniture with a rich history, continues to offer practical and aesthetically pleasing storage solutions for modern homes. This comprehensive guide delves into the design, construction, and customization options available when undertaking a hutch woodworking project. From conceptualization to final finishing, we will explore the intricacies of crafting a hutch that perfectly complements your personal style and storage needs.

Designing Your Custom Hutch: Considerations for Form and Function

Before embarking on the construction phase, careful planning is paramount. The design process involves several crucial considerations that will directly impact the final product's functionality and aesthetic appeal. Careful consideration should be given to the intended location, available space, and desired storage capacity.

Defining the Purpose and Dimensions

Purpose: What will your hutch primarily store? Dishes? Books? A combination of items? Defining the intended contents will dictate the internal configuration, including shelf spacing, drawer sizes, and overall dimensions. A hutch designed for delicate china will necessitate different shelf supports and spacing than one intended for bulky books.

Dimensions: Measure the available space meticulously. Account not only for the hutch's footprint but also its height and depth. Consider the ceiling height and ensure adequate clearance for opening doors and drawers without obstruction. Remember to account for the thickness of the wood and any added hardware. Accurate measurements are critical to avoid costly mistakes during construction.

Choosing the Right Wood and Hardware

The choice of wood significantly influences both the aesthetic and structural integrity of the hutch. Hardwoods like oak, maple, cherry, and walnut offer durability and a refined appearance, while softer woods such as pine and poplar provide a more affordable alternative. Consider the wood's grain, color, and overall finish when making your selection.

Hardware: The selection of hinges, drawer slides, knobs, and pulls will contribute significantly to the hutch's functionality and visual appeal. Opt for high-quality hardware that is durable and complements the overall style. Consider the weight of the doors and drawers when choosing hinges and slides to ensure smooth operation over time. A variety of finishes are available, from antique brass to brushed nickel, allowing for customization to match your décor.

Conceptualizing the Internal Layout

The internal layout of the hutch is critical for optimal storage efficiency. This involves carefully planning the number and placement of shelves, drawers, and other storage compartments. Consider using a combination of fixed and adjustable shelves to accommodate items of varying heights. For added organization, consider incorporating dividers within drawers or on shelves. Sketch multiple layouts to visualize different options and select the most efficient and aesthetically pleasing configuration.

Style Considerations: Traditional, Modern, or Rustic?

The hutch's style should complement the existing décor of the room. A traditional hutch might feature ornate carvings, detailed molding, and a classic finish. A modern hutch could embrace clean lines, minimalist design, and a contemporary finish. A rustic hutch might utilize reclaimed wood, distressed finishes, and visible hardware. Choose a style that harmonizes with the overall aesthetic of your home.

Constructing Your Hutch: A Step-by-Step Guide

Once the design is finalized, the construction phase can begin. This involves cutting, assembling, and finishing the various components of the hutch. Precision and attention to detail are crucial throughout this process. Proper joinery techniques are essential for creating a sturdy and long-lasting piece of furniture.

Cutting the Wood Components

Using precise measurements derived from the design plans, cut the wood components to the required dimensions. Employ a miter saw or table saw for clean, accurate cuts. Ensure that all cuts are square and true to avoid dimensional inaccuracies that could compromise the structural integrity of the hutch.

Assembling the Hutch Frame

Construct the main frame of the hutch using mortise and tenon joints, dowel joints, or pocket hole joinery. These techniques create strong, durable connections that will withstand the weight of the stored items. Use wood glue and clamps to ensure a tight fit and proper alignment of the components.

Installing Shelves and Drawers

Install shelves using shelf pins, shelf brackets, or dadoes. Ensure that the shelves are level and securely fastened to the frame. Install drawer slides, ensuring that they are properly aligned and function smoothly. Install drawer fronts and handles. Consider adding dividers to drawers for improved organization.

Adding Doors and Hardware

Hang the doors using high-quality hinges. Ensure that the doors open and close smoothly without binding or obstruction. Install the chosen hardware, including knobs, pulls, and any decorative accents. Adjust the hardware as needed to ensure proper functionality.

Finishing Touches and Customization Options

The final stage involves finishing the hutch and adding any desired customization options. This includes sanding, staining, painting, and applying a protective sealant. The choice of finish will depend on the desired aesthetic and the type of wood used.

Sanding and Finishing

Sand all surfaces thoroughly to achieve a smooth, even finish. Use progressively finer grits of sandpaper to remove any imperfections. Apply stain or paint according to the manufacturer's instructions. Once the finish is dry, apply a clear coat of polyurethane or varnish to protect the wood from scratches and moisture.

Customization Options: Adding a Unique Touch

Consider adding unique features to personalize your hutch. These could include:

  • Inlaid designs: Add intricate inlaid patterns for a sophisticated touch.
  • Glass doors: Showcase your treasured collections behind glass doors.
  • Lighting: Incorporate interior lighting to highlight the contents.
  • Custom hardware: Choose unique knobs and pulls to reflect your personality.
  • Etched or painted designs: Add decorative elements through etching or painting.

By carefully planning and executing each step, you can create a beautiful and functional hutch that enhances your home's aesthetic appeal and provides practical storage solutions for years to come. Remember, the key to a successful woodworking project lies in careful planning, precision execution, and attention to detail. The satisfaction of crafting a custom piece of furniture is a rewarding experience that adds a unique personal touch to your living space.

Share:

How to craft a custom cradle with elegant wood finishes

Building a Cradle Fit for a King (or Queen!): A DIY Guide

Hey there, future crafters! So you're thinking of building a cradle? That's amazing! There's something incredibly special about creating something with your own hands, especially something as precious as a cradle for your little one. This isn't just about building a box; it's about building a legacy, a piece of furniture that will hold beautiful memories for years to come. And with a bit of planning and elbow grease, you can craft a truly elegant piece with stunning wood finishes. Let̢۪s dive in!

Planning Your Perfect Cradle

Before you even think about touching a saw, you need a plan. This isn't rocket science, but careful planning will save you headaches (and possibly some fingers!).

Choosing Your Wood

This is where the fun begins! The choice of wood dramatically affects the final look and feel of your cradle. Consider these options:
  • Hardwoods: Hardwoods like cherry, maple, walnut, and oak are strong, durable, and offer beautiful grains. They're perfect for a heirloom-quality cradle, but they can be more expensive and require more skill to work with. Think of the rich, warm tones of cherry, the sleek lines of maple, or the deep, luxurious feel of walnut.
  • Softwoods: Pine and cedar are softer and easier to work with, making them great for beginners. Pine is readily available and relatively inexpensive. Cedar offers a lovely aroma and natural insect-repellent qualities, which is a definite plus!
  • Plywood: Plywood is a cost-effective option that offers good stability. However, it might not be as aesthetically pleasing as solid wood, and you'll want to choose a high-quality plywood with a nice veneer if you opt for this.

Design and Dimensions

Next, consider the size and shape of your cradle. You'll want something that's comfortable and safe for your baby. Look at existing cradle designs for inspiration, but remember to prioritize safety. Standard cradle dimensions are roughly 30-36 inches long and 18-24 inches wide, but adjust based on your design and the space you have available.

Gathering Your Tools and Materials

This is a crucial step. Having everything you need ready before you start will make the process smoother. You'll likely need:
  • Wood (according to your chosen design and dimensions)
  • Wood glue
  • Wood screws (appropriate size and length)
  • Sandpaper (various grits)
  • Saw (hand saw, circular saw, or jigsaw)
  • Measuring tape and square
  • Clamps
  • Wood finish (stain, paint, varnish, or oil)
  • Brushes and rags
  • Safety glasses and dust mask
  • Optional: Router, for more intricate designs

Building Your Cradle: A Step-by-Step Guide

This part will be highly dependent on your chosen design, but let̢۪s outline some general steps. Remember to always prioritize safety. If you're not comfortable with any of these steps, seek help from a more experienced woodworker.

Cutting the Wood

Based on your design, cut the wood pieces to the correct sizes. Accuracy is key here. Use a measuring tape and square to ensure precise cuts, and double-check your measurements before making each cut.

Assembling the Cradle

This is where the magic happens! Carefully assemble the cradle sides, base, and headboard. Use wood glue and screws for strong joints. Clamps are essential to hold the pieces together while the glue dries. Let the glue cure completely before moving on.

Sanding and Finishing

Once assembled, sand the cradle thoroughly using different grits of sandpaper, starting with a coarser grit and gradually moving to finer ones for a smooth finish. This step is critical for creating a beautiful, safe surface for your baby. Remove all dust before applying the finish.

Applying the Wood Finish

Now for the fun part! Choose your finish. A stain will enhance the wood's natural grain, while paint will allow you to create a unique color scheme. Varnish provides a protective layer, and oil finishes offer a more natural feel. Follow the manufacturer's instructions carefully for application. Apply multiple coats for a durable and even finish.

Adding the Finishing Touches

Once the finish is completely dry, you can add any extra details you like, such as decorative molding, carvings, or even a personalized plaque. Let your creativity flow! Remember, less is often more when it comes to baby furniture, so avoid anything that could pose a safety hazard.

Safety First!

This is paramount. Before letting your little one anywhere near the cradle, ensure all joints are secure, all sharp edges are sanded smooth, and the finish is completely dry and non-toxic. Consider adding a mattress that is a snug fit to prevent your baby from rolling around. Always supervise your baby in the cradle.

Frequently Asked Questions

Q: What type of wood is best for a cradle?

A: Hardwoods like cherry, maple, and walnut are beautiful and durable, but softwoods like pine and cedar are easier to work with for beginners. Plywood can also be a cost-effective option.

Q: How much does it cost to build a cradle?

A: The cost depends on the wood you choose and the complexity of the design. Expect to spend anywhere from $100 to $500 or more on materials alone.

Q: How long does it take to build a cradle?

A: This depends on your experience and the complexity of the design. Expect to spend several days, even a week or two, especially if you're a beginner.

Q: Is it safe to use stain and varnish on a baby's cradle?

A: Yes, but be sure to use non-toxic finishes specifically designed for children's furniture. Allow ample drying time before use.

Q: Can I build a cradle without prior woodworking experience?

A: It's possible, but starting with a simpler design and seeking guidance from more experienced woodworkers is recommended. There are many online resources and tutorials available that can help.

There you have it! Building a cradle is a labor of love, but the reward of creating a beautiful and unique piece for your little one is immeasurable. Remember to take your time, prioritize safety, and most importantly, have fun!
Share:

Contemporary woodworking designs for open-concept living spaces

Bringing the Warmth of Wood into Your Open-Concept Home

Hey there, fellow design enthusiasts! Open-concept living is all the rage, right? That airy, spacious feel is amazing, but sometimes it can feel…empty. That’s where the magic of contemporary woodworking comes in! We’re talking about seamlessly blending beautiful, functional wooden pieces into your open plan, creating a space that's both stylish and incredibly cozy. Let's dive into some ideas to warm up your modern living space with the natural beauty of wood.

Defining Your Style: Modern Meets Wood

Before we jump into specific pieces, let̢۪s chat about style. Contemporary woodworking isn't just about rustic farmhouse vibes (although those are lovely!). It's about clean lines, minimalist aesthetics, and often, unexpected details. Think sleek, geometric shapes meeting the warmth of natural wood tones. We̢۪re aiming for a sophisticated and inviting feel, not a cluttered, old-fashioned look.

The Spectrum of Wood Tones

Choosing the right wood tone is crucial. Lighter woods like ash or maple bring a bright, airy feel that complements open-plan spaces beautifully. They won't visually shrink the room. If you̢۪re going for a more dramatic look, consider darker woods like walnut or cherry. Just remember to balance them with lighter elements elsewhere in the room to prevent it from feeling too heavy.

Mixing Materials: Wood̢۪s Best Friends

Don't be afraid to mix materials! Wood pairs exceptionally well with metal (think sleek black accents), glass (for a touch of airy sophistication), and even stone (for a grounding element). The key is balance and a cohesive color palette. Too many clashing materials will make your space feel busy, defeating the purpose of an open-concept design.

Statement Pieces: Showstopping Woodwork

Let’s talk about the real showstoppers â€" the pieces that will anchor your open-concept space and make a bold statement. These aren’t just functional; they're design elements that set the tone for the entire area.

The Magnificent Media Console

Forget your typical bulky entertainment center. A contemporary wood media console, perhaps with floating shelves and integrated cable management, can be a stunning focal point. Imagine a sleek, low-profile design in rich walnut, showcasing your tech while adding a touch of sophisticated elegance. Think clean lines, hidden storage, and maybe even some subtle metal detailing.

A Custom-Built Bookshelf That Wowes

Bookshelves are a must in any living space, but in an open-concept home, they should be more than just storage. Think about a dramatic, floor-to-ceiling bookshelf, perhaps with geometric shelving or a unique ladder system for accessing higher shelves. The design possibilities are endless!

Dining Table Perfection

The dining table is often the heart of an open-concept home. A handcrafted, solid wood dining table can instantly elevate your space. Consider a live-edge slab for a rustic-modern feel, or a clean, minimalist design with tapered legs for a more contemporary aesthetic. Pair it with equally stylish chairs â€" a mix of wood and upholstery can be stunning.

Subtle Touches: Adding Wood Without Overdoing It

Not everyone wants a dramatic statement piece in their open-concept living room. That's perfectly fine! There are plenty of ways to incorporate wood in a more subtle and understated way.

Floating Shelves for Display

Simple floating shelves in a light wood can add visual interest without overwhelming the space. Use them to display cherished objects, books, or plants â€" the possibilities are limitless! They’re super versatile and can be added to any area of your open plan, from the living room to the kitchen.

Wooden Accents in Unexpected Places

Think outside the box! Consider a wooden lamp base, a wooden tray for your coffee table, or even wooden knobs and pulls on your kitchen cabinets. These little touches can make a big difference in tying your space together and adding a warm, natural element to your decor.

The Power of a Wooden Coffee Table

A beautifully crafted coffee table is an essential piece in any living room, especially in an open-concept design. Look for unique shapes, contrasting materials, or interesting grain patterns that draw the eye and create a visually appealing focal point in the space.

Maintaining Your Wooden Wonders

Okay, so you've got your beautiful wooden pieces. Now, how do you keep them looking their best? Regular maintenance is key! Dusting regularly is a must. For more significant cleaning, always check the manufacturer's recommendations for your specific wood type and finish. Avoid harsh chemicals and abrasive cleaners. A little TLC will keep your woodworking looking stunning for years to come.

Commonly Asked Questions

Q: Are contemporary wood pieces expensive?

A: The price can vary greatly depending on the type of wood, the complexity of the design, and whether you're buying a mass-produced piece or a custom-made one. However, even smaller, carefully chosen pieces can make a significant impact. It's about investing in quality, not necessarily breaking the bank.

Q: How do I choose the right wood type for my space?

A: Consider your existing décor. Lighter woods work well with brighter spaces, while darker woods can add drama and sophistication. Also think about the overall feel you want to create. Do you want a rustic, modern, or minimalist look?

Q: Can I DIY some of these projects?

A: Absolutely! Many smaller woodworking projects, like floating shelves or simple coffee tables, are achievable for DIY enthusiasts with some basic skills and tools. There are tons of resources online to help you get started.

Q: How do I integrate wood into a modern, minimalist space?

A: Focus on clean lines, simple shapes, and light wood tones. Avoid overly ornate designs. Choose pieces with a minimalist aesthetic, and make sure they complement the other elements in your space.

Q: What are some sustainable wood choices?

A: Look for sustainably sourced woods certified by organizations like the Forest Stewardship Council (FSC). This ensures that the wood comes from responsibly managed forests.

I hope this has given you some inspiration for incorporating contemporary woodworking into your open-concept living space. Remember, the key is to have fun, be creative, and find pieces that reflect your personal style! Happy decorating!

Share:

Free cradle woodworking blueprints for versatile nursery furniture

Free Cradle Woodworking Blueprints for Versatile Nursery Furniture

This document provides comprehensive information and guidance on acquiring and utilizing free woodworking blueprints for the construction of a versatile cradle, suitable for a variety of nursery settings and adaptable for future use. We will explore the advantages of building your own cradle, the sources for free blueprints, essential considerations for material selection and construction, and finally, offer valuable tips for enhancing the finished product and ensuring its longevity.

Advantages of Building Your Own Cradle

Constructing a cradle from scratch offers several distinct advantages over purchasing a commercially manufactured piece. Firstly, cost savings are significant. While the initial investment in materials might seem comparable, the elimination of retail markups results in substantial long-term cost reductions. Secondly, customization becomes a key advantage. Free blueprints often provide a base design that can be readily modified to suit personal preferences, including size, style, and finishing details. This allows for the creation of a truly unique piece, perfectly tailored to the nursery̢۪s aesthetics and the child's specific needs. Furthermore, building a cradle offers a fulfilling sense of accomplishment and allows for the creation of a heirloom-quality piece, imbued with personal care and attention to detail, far surpassing the mass-produced alternatives.

Locating Free Woodworking Blueprints

Finding reliable and detailed free woodworking blueprints for cradles requires a strategic approach. Several online resources offer plans, though careful vetting is crucial to ensure accuracy and safety. Below, we outline some potential sources and emphasize the importance of thorough review before commencing any construction:

Online Woodworking Communities and Forums

Numerous online communities dedicated to woodworking, such as woodworking forums and blogs, frequently feature shared plans and designs contributed by their members. These resources can be invaluable, offering a diverse range of styles and levels of complexity. However, it is imperative to carefully review the comments and feedback associated with any specific plan to assess its accuracy and identify potential issues that other builders may have encountered. Always prioritize plans with clear instructions, detailed diagrams, and positive user reviews.

Individual Woodworker Websites and Blogs

Many individual woodworkers maintain personal websites and blogs where they share their projects and plans. These often include detailed descriptions of the building process, material lists, and even accompanying videos or tutorials. While these resources can offer unique and well-documented plans, it is essential to verify the credibility of the source and ensure that the provided information is comprehensive and accurate. Look for websites with established reputations and positive reviews.

Public Libraries and Educational Institutions

Surprisingly, many public libraries and educational institutions offer access to woodworking books and plans, some of which may include cradle designs. These resources often provide a higher level of quality and reliability compared to some online sources. Checking your local library's catalogue or contacting the relevant departments of nearby colleges or vocational schools could unveil valuable resources.

Material Selection and Construction Considerations

Choosing appropriate materials and implementing safe construction practices are paramount to creating a durable and safe cradle. The selection of wood is particularly important, favoring hardwoods for their strength and longevity.

Wood Selection

Hardwoods like oak, maple, cherry, or walnut offer superior strength and durability, making them ideal for a cradle. Softwoods such as pine, while more affordable, are less resistant to wear and tear and may require additional reinforcement. Regardless of the chosen wood, ensure it is properly seasoned (dried) to prevent warping or cracking during and after construction. Prioritize sustainably sourced lumber to minimize environmental impact.

Hardware and Fasteners

The selection of hardware should prioritize safety and durability. Use high-quality wood screws, appropriate for the type of wood being used, and avoid using nails, which can pose a safety hazard. For any moving parts, such as rocking mechanisms, utilize sturdy and smooth-operating hardware designed for furniture applications. Ensure all fasteners are properly countersunk and any sharp edges are smoothed to prevent injury.

Construction Techniques

Adherence to sound woodworking techniques is essential. Accurate measurements and precise cuts are crucial to ensure the structural integrity of the cradle. Proper joinery techniques, such as mortise and tenon joints, dovetail joints, or strong dowel joints, will significantly enhance the strength and longevity of the finished product. Use a woodworking plan that details these steps and choose a plan that matches your woodworking skill level.

Finishing and Safety Enhancements

Once construction is complete, the cradle requires finishing and safety enhancements to guarantee its durability and the child's safety.

Finishing the Cradle

The finishing process is critical for protecting the wood and providing a smooth, child-safe surface. Apply several coats of non-toxic, child-safe varnish or paint, allowing ample drying time between each coat. Sand the surface between coats to ensure a smooth finish. Avoid using harsh chemicals or finishes that could emit harmful fumes or present a health risk to the child.

Safety Considerations

Before placing the child in the cradle, rigorously inspect every aspect of the construction. Ensure all joints are secure, screws are tightly fastened, and there are no sharp edges or protruding hardware. The mattress should fit snugly to prevent the child from becoming trapped or entangled. Adhere to all relevant safety standards and guidelines for infant cradles.

Adapting the Cradle for Future Use

Many cradle designs can be adapted for future use, extending their lifespan and reducing waste. For example, once the child outgrows the cradle, it can potentially be converted into a small toy chest, a bookshelf, or even a decorative piece of furniture. Consider this adaptability when selecting a blueprint, opting for designs that offer such versatile possibilities. The solid construction of a hand-made cradle will ensure its longevity and adaptability to various future functions.

Building a cradle from free woodworking blueprints offers a rewarding and cost-effective way to create a beautiful and functional piece of nursery furniture. However, it demands careful planning, meticulous execution, and a commitment to safety. By following these guidelines and exercising due diligence in all stages of the process, you can craft a cherished heirloom that will be treasured for generations.

Share:

Build a contemporary desk with free woodworking designs

Constructing a Contemporary Desk Utilizing Free Woodworking Designs

The creation of a bespoke desk offers a rewarding blend of artistic expression and practical functionality. This comprehensive guide details the construction of a contemporary desk leveraging readily available free woodworking designs, emphasizing precision, durability, and aesthetic appeal. We will explore various design considerations, material selection, tool requirements, and step-by-step assembly instructions, empowering even novice woodworkers to achieve a professional-quality result.

Phase 1: Design Selection and Material Acquisition

The foundation of any successful woodworking project lies in careful planning. Numerous free woodworking designs are accessible online, ranging from minimalist styles to more intricate configurations. Platforms like Ana White, Woodworking for Mere Mortals, and Instructables provide a wealth of readily downloadable plans, often including detailed diagrams, cut lists, and assembly instructions. It is crucial to select a design that aligns with your skill level and available tools. Beginners might benefit from simpler designs with fewer complex joinery techniques, while experienced woodworkers can tackle more challenging projects incorporating advanced joinery such as dovetails or mortise and tenon joints.

Choosing the Right Design

Consider the following factors when choosing your design:

  • Overall dimensions: Ensure the desk fits your workspace and intended use.
  • Storage solutions: Decide whether you require drawers, shelves, or a keyboard tray.
  • Material compatibility: Select a design compatible with your chosen wood type and thickness.
  • Joinery techniques: Assess the complexity of the joinery methods used in the design and your proficiency with them.
  • Aesthetic appeal: Choose a design that complements your existing décor and personal style.

Selecting and Sourcing Materials

The choice of wood significantly impacts the desk's durability, aesthetics, and cost. Hardwoods such as oak, maple, and cherry offer superior strength and longevity but come at a higher price. Softer woods like pine or fir are more budget-friendly but may require more care to prevent damage. Consider the following:

  • Wood type: Choose a wood with appropriate strength and grain pattern.
  • Wood thickness: Thicker wood provides greater stability and durability.
  • Wood grading: Opt for higher-grade wood for a more consistent appearance.
  • Hardware: Select high-quality drawer slides, hinges, and fasteners.
  • Finish: Choose a finish that complements the wood and provides protection.

Obtain your materials from reputable lumberyards or online retailers. Ensure you accurately calculate the required wood quantity, accounting for potential waste during cutting and shaping.

Phase 2: Preparation and Cutting

Prior to commencing assembly, meticulous preparation is paramount. This involves carefully reviewing the chosen woodworking plan, ensuring a complete understanding of each step. Accurately transferring the measurements from the plan to the wood is critical for a precise and aesthetically pleasing outcome. Improper measurements can lead to misalignment and instability in the finished product.

Accurate Measurement and Marking

Utilize a measuring tape and a combination square to accurately transfer the dimensions from the plan onto the wood. Marking should be clear, precise, and easily visible. Consider using a pencil or marking knife, ensuring the marks are distinct yet easily erasable if adjustments are needed.

Cutting the Wood Components

Employ appropriate cutting tools based on the design and your skill level. A table saw offers precise and efficient cutting for larger pieces, while a circular saw or hand saw might be suitable for smaller components or intricate cuts. Always prioritize safety by using appropriate safety equipment, including eye protection, hearing protection, and dust masks. Ensure the saw blade is sharp and properly adjusted to minimize tear-out and achieve clean, accurate cuts.

Once all components are cut, carefully review them against the plan to ensure accuracy before proceeding to assembly.

Phase 3: Assembly and Finishing

The assembly process follows the sequence outlined in the chosen woodworking plan. Precise alignment and secure fastening are crucial for structural integrity and overall aesthetic appeal. Different joinery techniques may be employed depending on the design, such as pocket holes, dowels, or more complex methods like mortise and tenon joints. Follow the instructions meticulously and ensure all joints are properly aligned and securely fastened.

Joinery Techniques

The choice of joinery depends on the design and desired strength. Common techniques include:

  • Pocket holes: A simple and effective method for joining wood pieces at an angle.
  • Dowels: Provide strong and aesthetically pleasing joints.
  • Mortise and tenon: A robust traditional joinery method offering exceptional strength and stability.
  • Biscuits: Used for aligning and strengthening wider joints.

Finishing Touches

Once the desk is fully assembled, it̢۪s time to apply a finish. This protects the wood and enhances its appearance. Sanding is crucial before finishing, removing any imperfections and ensuring a smooth surface. Start with coarser grit sandpaper and progressively move to finer grits for a flawless finish. Apply the chosen finish according to the manufacturer's instructions, ensuring even coverage and proper drying time. Multiple coats may be necessary for optimal protection and depth of color. Consider options such as:

  • Stain: Enhances the wood's natural grain and color.
  • Paint: Provides a smooth, even finish in a desired color.
  • Polyurethane: Offers excellent protection against moisture and scratches.
  • Oil: Provides a natural finish that enhances the wood's texture.

Phase 4: Quality Control and Refinement

Upon completion of the finishing process, thoroughly inspect the desk for any imperfections or areas requiring refinement. Check for alignment issues, loose joints, or uneven finishes. Minor imperfections can often be addressed with additional sanding or touch-up paint. Ensure all hardware functions smoothly and securely. Testing the functionality of drawers, shelves, and other components is crucial to identify any potential problems before declaring the project complete. Thorough quality control ensures a high-quality and durable finished product.

By following these steps and selecting a suitable free woodworking design, you can construct a contemporary desk that combines functionality, aesthetics, and personal expression. Remember, patience and attention to detail are key to achieving a professional-quality result. Enjoy the process of crafting your unique and personalized workspace.

Share:

Free plans for creating a cradle with adjustable rocking features

DIY Cradle with Adjustable Rocking: A Step-by-Step Guide

Hey there, future crafters! So, you're thinking about building a cradle for your little one? That's awesome! Building something yourself is incredibly rewarding, and a handmade cradle is brimming with love and personality. Plus, let's be honest, those store-bought ones can be seriously pricey. This guide will walk you through creating a beautiful, sturdy, and â€" best of all â€" *adjustable* rocking cradle. We're talking smooth rocking for soothing naps, and the option to lock it in place for those times when a steady, stationary crib is more practical. Get ready to roll up your sleeves and let's get crafting!

Choosing Your Materials: The Foundation of Your Cradle

Before we even think about sawing and hammering, let's talk materials. This is where you can really personalize your project! Think about the overall style you're aiming for â€" rustic, modern, minimalist? Your material choice will heavily influence the final look.

Wood Types: The Pros and Cons

Pine: This is a popular choice because it's readily available, relatively inexpensive, and easy to work with. It's lightweight, which is great for a cradle, but keep in mind it's softer than some other woods, so it might scratch or dent more easily.

Birch: A bit more expensive than pine, but it̢۪s stronger and harder, offering better durability. It also has a beautiful, light-colored grain.

Hardwoods (Oak, Maple, Cherry): These are the heavy hitters â€" strong, durable, and long-lasting. They’re also the most expensive and can be more challenging to work with if you’re a beginner. Think carefully before opting for these if this is your first woodworking project.

No matter what you choose, make sure your wood is well-seasoned (dried properly) to avoid warping or cracking down the line. Look for lumber graded for furniture making, to ensure it's free of significant knots and imperfections.

Hardware: The Crucial Components

You'll need some pretty standard hardware:

  • Wood screws (various sizes, depending on your wood thickness and the size of the cradle)
  • Wood glue
  • Sandpaper (various grits â€" start coarse and finish fine)
  • Finishing nails (optional, for extra security)
  • Curved rocking supports (These are essential for that rocking motion! Check online retailers or your local hardware store for these. They often come in a range of styles and sizes.)
  • Locking mechanism (This is what makes the adjustable feature possible! You can use strong bolts and nuts or investigate specialized cradle hardware online. Make sure it's super secure.)
  • Finish (paint, stain, varnish â€" your choice!)

Design and Planning: Getting Your Blueprint Ready

This is arguably the most important step. You'll need a detailed plan â€" either a sketch or a proper blueprint â€" outlining the dimensions of your cradle. There are countless free plans online, many specifically for rocking cradles. Consider these key aspects:

  • Size: The cradle should be large enough to comfortably accommodate your baby, but not so large that it feels overwhelming.
  • Height: Keep it at a comfortable height for you to reach in and out easily.
  • Rocking Mechanism: The rocking supports should be securely attached and provide a gentle, smooth rocking motion. Think about where you want the locking mechanism integrated for ease of use.
  • Safety: Prioritize safety above all else! Ensure there are no sharp edges or protruding parts that could harm your baby. The slats should be spaced appropriately to prevent your baby's head from getting trapped.

Don't be afraid to modify existing plans to fit your needs and style! Once you have a plan you̢۪re happy with, make sure you have all the necessary tools before you begin.

Construction: Bringing Your Cradle to Life

This section involves the hands-on work. I can't walk you through every single cut and screw, but I'll give you the general flow. Remember, safety first! Always wear appropriate safety gear, like safety glasses.

Cutting the Wood

Carefully cut your wood according to your plan. Accurate measurements are key here. Use a saw (circular saw, miter saw, or hand saw, depending on your comfort level and tools). Double and triple check your measurements to avoid mistakes.

Assembling the Cradle Base and Sides

This is where your plan really comes into play. Using wood glue and screws, assemble the base and sides of your cradle. Ensure all joints are strong and secure. Use clamps to hold pieces in place while the glue dries. If you're using finishing nails, hammer them in carefully to avoid splitting the wood.

Attaching the Rocking Supports

This is where the rocking magic happens! Attach the curved rocking supports securely to the base of the cradle, following your plan's instructions. Make sure they are evenly spaced and firmly attached to prevent wobbling.

Adding the Locking Mechanism

This is the part that makes your cradle adjustable. Carefully attach your chosen locking mechanism, ensuring it's sturdy and easily operated. You might need to pre-drill holes for the bolts to prevent the wood from splitting.

Installing the Slats

Once the base is complete, add the slats to the sides. Ensure that they're spaced correctly to meet safety standards and that they̢۪re securely attached.

Sanding and Finishing

Once everything is assembled, sand down all the surfaces thoroughly, starting with a coarser grit and moving to finer grits for a smooth finish. Once sanded, apply your chosen finish (paint, stain, varnish). Allow sufficient drying time between coats.

Safety Checks: Making Sure Your Cradle is Baby-Safe

Before you let your little one snuggle in, do a thorough safety check!

  • Stability: Make sure the cradle is rock-solid and doesn't wobble.
  • Slats: Check that the slats are properly spaced and securely attached. No gaps large enough for a little head to get stuck!
  • Sharp Edges: Carefully check for any sharp edges or splinters that could harm your baby. Sand them down immediately if needed.
  • Locking Mechanism: Test the locking mechanism repeatedly to ensure it's secure and easy to operate.
  • Materials: Ensure all materials used are non-toxic and baby-safe.

Frequently Asked Questions (FAQs)

Q: What kind of mattress should I use?

A: Use a firm, flat mattress specifically designed for cradles. Never use a soft or padded mattress.

Q: How often should I check the cradle for safety?

A: Regularly check the cradle for any signs of wear and tear, loose screws, or damaged parts. Safety is paramount.

Q: Can I use this plan to build a larger crib?

A: While this plan is specifically for a cradle, you can adapt the design principles to build a larger crib. You̢۪ll need to adjust the dimensions and consider additional structural elements.

Q: What if I don't have all the tools mentioned?

A: You may be able to borrow tools from friends or family, or rent them from a local hardware store. Many hardware stores also offer DIY workshops.

Q: Is it really safe to build a cradle myself?

A: Building a cradle yourself can be safe if you follow detailed plans, use quality materials, and prioritize safety throughout the process. However, if you're unsure about your abilities, it's always best to err on the side of caution and buy a commercially made cradle.

Remember, building a cradle is a labor of love. Take your time, be precise, and most importantly, have fun creating a special and safe sleeping space for your little one!

Share:

Elegant corner pergola plans for outdoor relaxation

Elegant Corner Pergola Plans for Outdoor Relaxation

A corner pergola offers a unique and sophisticated solution for enhancing outdoor living spaces. Its strategic placement maximizes the use of available area while providing a visually appealing focal point. This comprehensive guide delves into the design, construction, and stylistic considerations for creating an elegant and functional corner pergola, transforming your outdoor environment into a haven of relaxation and entertainment.

I. Design Considerations: Architecting Your Corner Retreat

Before embarking on the construction of your corner pergola, meticulous planning is paramount. Careful consideration of several key aspects will ensure a structure that seamlessly integrates with your existing landscape and fulfills your specific needs.

A. Site Assessment and Positioning

The initial stage involves a thorough assessment of your outdoor space. Identify the ideal corner location, taking into account factors such as sunlight exposure, prevailing winds, and proximity to existing structures. Consider the views from the pergola; strategic placement can accentuate desirable vistas while minimizing less attractive ones. Note existing underground utilities to prevent accidental damage during construction. Survey the ground to ensure it's level and able to support the weight of the pergola.

B. Dimensions and Scale

The dimensions of your pergola should be proportionate to the surrounding space. An overly large structure can overwhelm a small area, while a diminutive one might appear lost in a spacious setting. Consider the intended use. A larger pergola will comfortably accommodate seating, dining, or even a small outdoor kitchen. Detailed sketches and potentially even 3D modeling can aid in visualizing the final product and making informed decisions regarding size.

C. Material Selection: A Symphony of Style and Durability

The choice of materials significantly influences both the aesthetic appeal and longevity of your pergola. Pressure-treated lumber offers a cost-effective option with good durability, requiring regular maintenance. Cedar and redwood provide natural resistance to decay and insects, requiring less upkeep, but come at a higher cost. Aluminum offers a low-maintenance, durable solution with a modern aesthetic. Wrought iron provides an ornate, classic look but demands regular maintenance to prevent rust. The choice should align with the overall architectural style of your home and landscape.

II. Construction: A Step-by-Step Guide to Building Your Pergola

The construction process requires careful attention to detail and adherence to building codes. While professional assistance is always recommended for complex projects, many individuals can successfully construct a corner pergola with the right preparation and tools.

A. Foundation and Footings

A stable foundation is crucial for the longevity of the pergola. Concrete footings are generally recommended, providing a strong base capable of withstanding the stresses of the structure. The depth and size of footings should be determined based on local soil conditions and the weight of the pergola. Accurate placement according to your plan is critical to ensure the pergola̢۪s squareness and stability.

B. Post Erection and Leveling

The corner posts form the foundation of the pergola̢۪s structure. Ensure they are plumb and level using a spirit level and shims as needed. Secure the posts to the concrete footings using appropriate fasteners, ensuring a robust connection capable of withstanding various weather conditions. Precise measurements and accurate positioning are essential to achieve a visually appealing and structurally sound pergola.

C. Beam and Rafter Installation

The beams connect the corner posts, providing a framework for the rafters. Use appropriate fasteners to securely join the beams to the posts. The rafters are then attached to the beams, creating the roof structure. Maintain consistent spacing between the rafters to ensure even weight distribution and a uniform appearance. Pre-drilling holes is recommended to prevent the wood from splitting.

D. Roofing and Finishing Touches

The roofing material completes the pergola's structure and provides shade. Popular choices include lattice, corrugated plastic, polycarbonate panels, or even a retractable awning for greater flexibility. Ensure the roofing material is securely attached and weatherproof. Consider adding finishing touches such as lighting, climbing plants, or decorative elements to enhance the aesthetic appeal.

III. Style and Aesthetics: Personalizing Your Outdoor Oasis

The style of your corner pergola should complement the existing architecture and landscaping. Numerous options exist to create a unique and personalized space.

A. Architectural Styles

Consider incorporating architectural elements that reflect your personal preferences. A rustic style might feature rough-hewn timber and natural finishes, while a modern design might incorporate clean lines and sleek materials like aluminum. Mediterranean styles often feature intricate latticework and ornate details, while a minimalist design prioritizes simplicity and functionality.

B. Color and Finishes

The color and finish of your pergola can significantly impact its overall appearance. A natural wood finish complements many garden settings, while stained or painted finishes offer greater versatility. Consider the colors of your house and surrounding landscape when making your selection. A darker stain can add a sense of formality, while lighter colors maintain a more airy feel.

C. Landscaping and Accents

Strategic landscaping can enhance the beauty of your corner pergola. Climbing plants such as ivy or jasmine can be trained to grow across the structure, creating a lush and verdant canopy. Potted plants, hanging baskets, and outdoor lighting can further enhance the ambiance. Consider adding comfortable seating, cushions, and outdoor rugs to create a welcoming and relaxing space.

IV. Maintenance and Preservation: Ensuring Long-lasting Beauty

Regular maintenance is essential to preserve the beauty and structural integrity of your pergola. A well-maintained pergola will provide years of enjoyment.

  • Regular Cleaning: Periodically clean the pergola to remove dirt, debris, and leaves. Pressure washing can be effective but should be used cautiously to avoid damaging the wood.
  • Wood Treatment: For wooden pergolas, apply a protective sealant or stain every few years to prevent damage from the elements. This will help protect the wood from rot, insects, and UV degradation.
  • Inspection and Repairs: Regularly inspect the structure for any signs of damage, such as loose screws, cracked wood, or rust. Address any issues promptly to prevent further deterioration.
  • Plant Maintenance: If using climbing plants, regularly prune them to maintain their shape and prevent them from overwhelming the pergola's structure.
  • By carefully considering the design, construction, and stylistic aspects, you can create an elegant corner pergola that serves as a stunning focal point for your outdoor space. This meticulously planned structure will transform your garden or patio into a serene retreat, offering years of relaxation and enjoyment. Remember, attention to detail at every stage, from initial planning to ongoing maintenance, will contribute to the longevity and aesthetic excellence of your corner pergola.

    Share:

    DIY instructions to build a wooden toolbox

    Build Your Own Badass Wooden Toolbox!

    Hey there, fellow DIY enthusiasts! So, you're looking to build a toolbox? Fantastic! There's something incredibly satisfying about crafting something useful with your own two hands, and a sturdy wooden toolbox is a project that's both rewarding and practical. This guide will walk you through the process step-by-step, even if you're a complete beginner. Don't worry, we'll keep it simple and fun. Let's get started!

    What You'll Need: The Gathering of Supplies

    Before we dive into the construction, let's make sure you've got everything you need. Running to the hardware store mid-project is a real mood killer, trust me. This list covers a basic toolbox; you can always adjust it based on your desired size and features.

    Materials:

    • Wood: You'll need some sturdy wood. Pine is a good, affordable choice, but hardwoods like oak or maple will make a seriously tough and beautiful toolbox. Aim for about 6-8 boards, depending on your desired size (more details on sizing below!). You'll want them at least ½ inch thick.
    • Wood Glue: A good quality wood glue is essential for strong joints.
    • Wood Screws: Get a variety of sizes â€" some longer ones for the main construction and shorter ones for smaller details. I recommend using screws that are slightly longer than the thickness of your wood so they grab well.
    • Handles: Choose your favorite style! You can find pre-made handles at most hardware stores, or get creative and use something you already have.
    • Hinges: For the lid. Again, plenty of options available!
    • Sandpaper: Various grits, from coarse to fine, will help smooth everything out.
    • Wood Finish (Optional): This is where you can add some personality. Stain, paint, varnish â€" the possibilities are endless!

    Tools:

    • Measuring Tape & Pencil: Accuracy is key!
    • Saw: A circular saw or a hand saw will work. A jigsaw is helpful for more intricate cuts.
    • Drill and Drill Bits: Make sure you have drill bits that match the size of your screws.
    • Screwdriver (or Drill with Screwdriver Bit): To drive those screws home.
    • Clamps: These will hold your pieces together while the glue dries.
    • Safety Glasses & Ear Protection: Always protect your eyes and ears!

    Building Your Toolbox: Let's Get Crafting!

    Okay, now for the fun part! Let's build this thing. This guide assumes a basic rectangular toolbox; feel free to get creative with shapes and sizes!

    Step 1: Cutting the Wood

    First, decide on the dimensions of your toolbox. Think about what you'll be storing in it. A good starting point might be 18 inches long, 12 inches wide, and 8 inches deep. Once you have your dimensions, cut your boards accordingly. You'll need two pieces for the sides, two pieces for the ends, one piece for the bottom, and one piece for the lid (slightly larger than the bottom to allow for overlap).

    Step 2: Assembling the Box

    Now, apply wood glue to the edges of the bottom piece and the ends of the side pieces. Clamp the pieces together to form the sides of the box. Make sure everything is square and aligned. Once the glue is set (check the instructions on the glue bottle), pre-drill pilot holes and screw the pieces together.

    Step 3: Attaching the Lid

    Repeat the gluing and screwing process to attach the lid using hinges. Make sure the hinges are positioned evenly and allow for a smooth opening and closing of the lid.

    Step 4: Adding the Handle

    This is where you can get creative! Attach your chosen handles using screws. Pre-drilling holes is a must here to prevent the wood from splitting. Make sure your handles are well positioned and secure.

    Step 5: Sanding and Finishing

    Once everything is assembled, it's time to sand! Start with a coarser grit sandpaper to remove any rough edges or imperfections, then gradually move to finer grits to achieve a smooth finish. This is crucial for both aesthetics and a pleasant feel. Once sanded, apply your chosen finish (stain, paint, varnish). Follow the manufacturer's instructions for drying times.

    Tips and Tricks from a Seasoned DIYer

    Here are a few extra bits of wisdom that might save you some headaches:

    • Measure twice, cut once: This old saying is a lifesaver. Accuracy is key to a good-looking toolbox.
    • Use clamps liberally: Clamps are your best friend when it comes to gluing wood. They ensure that everything stays aligned while the glue dries.
    • Pre-drill pilot holes: This prevents the wood from splitting when you screw things together.
    • Don't rush the process: Take your time and enjoy the experience. A rushed project often leads to mistakes.
    • Get creative with the design: Don't feel limited by the basic rectangular shape. Think outside the box (pun intended!) and add dividers, compartments, or other features.

    Frequently Asked Questions

    I get it â€" building things can be intimidating. So here are some common questions I get about building a wooden toolbox, answered in plain English:

    • Q: What kind of wood is best? A: Pine is a great budget-friendly option, but hardwoods like oak or maple will be more durable and look more impressive.
    • Q: How do I make sure my joints are strong? A: Use plenty of wood glue and pre-drill pilot holes before screwing things together. Clamps are also vital for keeping everything aligned while the glue dries.
    • Q: What if my wood splits when I'm screwing? A: You probably didn't pre-drill pilot holes! Always pre-drill, especially when working with harder woods.
    • Q: Can I add dividers to my toolbox? A: Absolutely! You can easily add dividers using extra pieces of wood. Just remember to cut them to size and attach them securely.
    • Q: What's the best way to finish the toolbox? A: That's up to you! Stain gives a natural look, paint offers vibrant colors, and varnish protects the wood and gives it a nice sheen.
    • Q: How long does this project take? A: Depending on your experience and how fancy you get, it can take anywhere from a few hours to a couple of days. Don’t rush it!

    There you have it! Your very own DIY wooden toolbox. Go forth and build something amazing! And if you get stuck, don't hesitate to ask questions. Happy crafting!

    Share:

    Woodworking wall shelf ideas for functional home organization

    Unlock Your Home's Potential: Functional Woodworking Wall Shelf Ideas

    Tired of clutter taking over your living space? Wall shelves offer a fantastic solution, seamlessly blending style and function. But forget those generic, mass-produced units; we're talking about the charm and versatility of handcrafted woodworking wall shelves. This article explores inspiring designs that transform empty wall space into organized havens, tailored perfectly to your needs. Prepare to unleash your inner DIY enthusiast and create stunning, practical storage solutions.

    Beyond the Basic: Exploring Diverse Shelf Designs

    Move beyond the simple, rectangular shelf. Woodworking allows for boundless creativity. Consider incorporating unique angles, curves, or even asymmetrical designs to add visual interest. A staggered shelf arrangement, for example, creates a dynamic look and offers varied storage options for items of differing sizes. Picture a set of shelves cascading down a wall, each slightly offset from the next, holding everything from potted succulents to cherished books. The possibilities are as limitless as your imagination!

    Floating Shelves: A Modern Marvel

    Floating shelves offer a minimalist aesthetic, seamlessly integrating with your wall without bulky brackets. Their clean lines create a sense of spaciousness, perfect for modern or contemporary interiors. However, the hidden bracketry requires careful planning and precision during installation to ensure sturdy support. Remember to select wood species that complement your existing décor, and consider adding a subtle finish, such as a clear coat or light stain, to enhance the natural beauty of the wood.

    Corner Shelves: Maximizing Tight Spaces

    Don't let awkward corners go to waste! Corner shelves cleverly utilize often-overlooked space, providing extra storage without sacrificing floor area. These shelves can be designed in various shapes, from simple triangular units to more complex, multi-tiered designs that optimize vertical space. Experiment with different wood types and stains to create a cohesive look with your existing furniture. Consider adding decorative elements like carved edges or metal accents for a more personalized touch.

    Materials and Techniques: Crafting Your Perfect Shelves

    The choice of wood significantly impacts the final aesthetic and functionality of your shelves. Hardwoods like oak or maple offer durability and a rich grain, ideal for heavier items. Softer woods like pine or fir are easier to work with for beginners, offering a more rustic charm. Consider the overall style of your home when making your selection. Beyond the wood itself, explore various woodworking techniques to elevate your design. Inlaying contrasting wood species, adding intricate joinery details, or even incorporating metal brackets can all transform a simple shelf into a stunning statement piece.

    Essential Tools and Materials

    Before you begin, gather the necessary tools and materials. This will typically include:

    • Wood of your chosen type and dimensions
    • Measuring tape and pencil
    • Saw (circular saw, miter saw, or hand saw)
    • Sandpaper (various grits)
    • Wood glue and clamps
    • Screws and drill
    • Wood stain or finish (optional)
    • Level and brackets (if not floating shelves)

    From Concept to Creation: A Step-by-Step Guide

    Creating your own woodworking wall shelves involves several key steps. First, carefully plan your design, including dimensions, materials, and the number of shelves. Next, cut the wood pieces to the precise measurements you've determined. Then, assemble the shelves using your chosen joinery techniques (e.g., dowels, pocket holes, or biscuits). Sand all surfaces smooth, ensuring a professional finish. Finally, apply your chosen stain or finish, and carefully install the shelves on your wall, ensuring they are level and securely fastened. Remember safety first â€" always wear appropriate safety gear when using power tools.

    With a little creativity and some woodworking skills, you can transform your home with beautiful and functional wall shelves. So, grab your tools and get started on your next DIY project!

    Share:

    Cari Blog Ini

    Powered by Blogger.

    Arsip Blog

    Label

    Arsip Blog

    Recent Posts

    Pages